

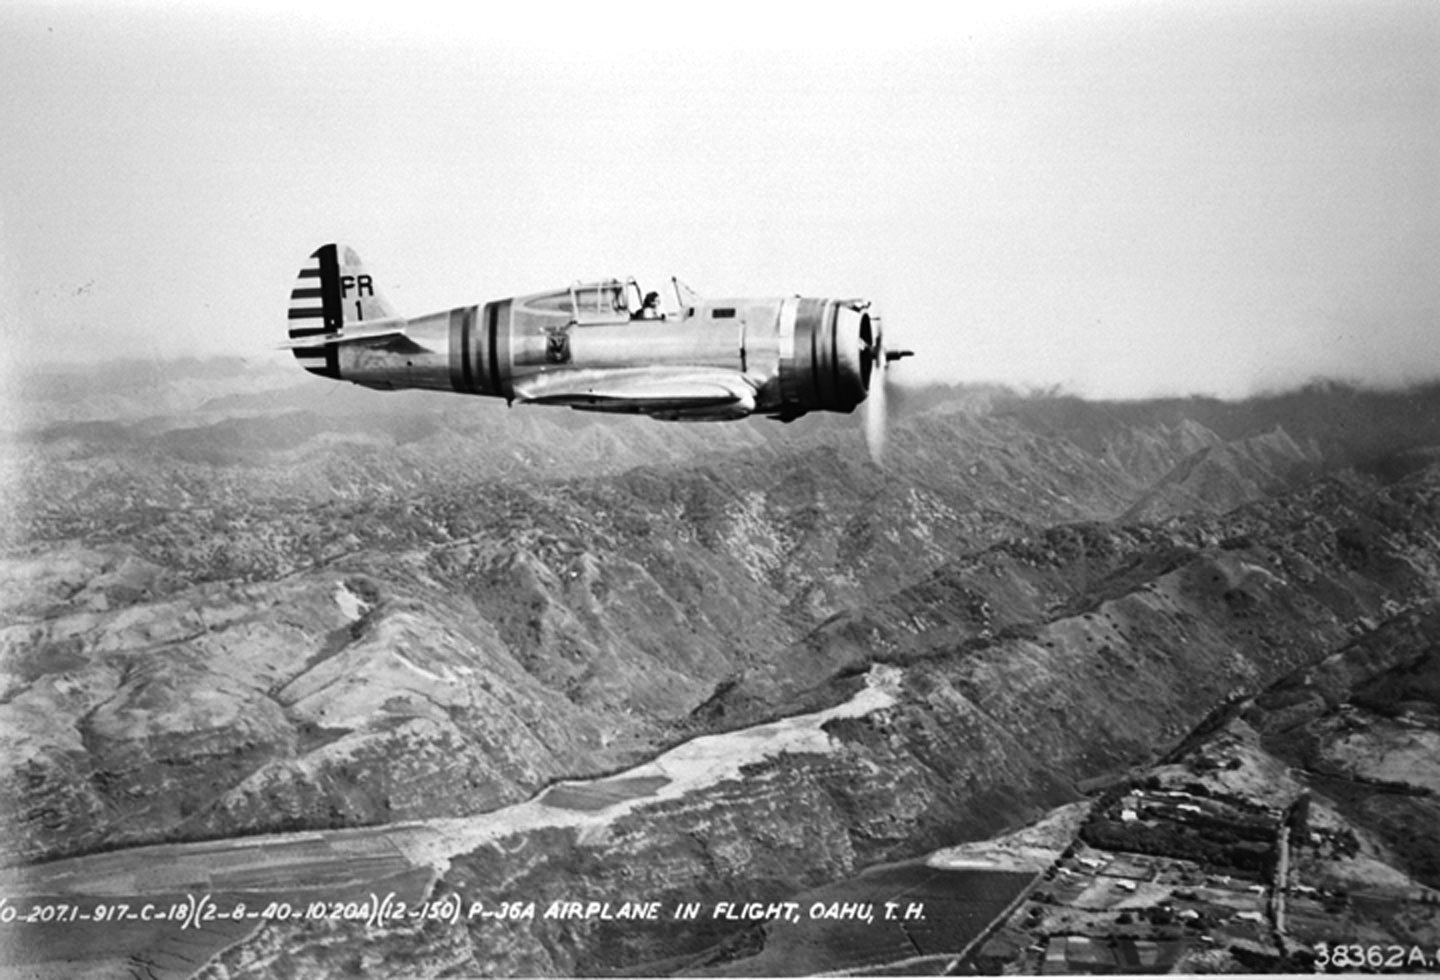
P-36A Pearl Harbor defender


Yorumlar
54 8 May 2020, 17:11
Thank you for joining in. Currently working on the wing, fit is unfortunately bad.
16 May 2020, 21:16
Will do! ???? Currently I'm in the proces of parts cleanup and prepping them for priming. I already had to remove lots of plastic on the inner part of the wing in order to trim the leading edges a bit. Your build is a great reference for me so a big thank you for tackling it!
4 July 2020, 16:27
Glued all parts together that could be done before priming. Test fit of the cockpit to fuselage showed that it's decent enough
14 October 2020, 18:50
Following! AZModel is developing worse since 2-3 years in my opinion. And they take KP with them now as it seems..
I heard there are some major issues and animosities inside the Czech Manufactures community 🙂
19 October 2020, 15:47
Thanks for joining! AZ seems to have lovered their standards for some of their kits - this is unfortunately one of them and the P-36A-8 is even worse in regards that the engine there is unusable. They made a decent attempt with their Mig-19 recently however. I like them very much for one thing though - many of thir kits like the BF-109 and also the P-36 have very decent cockpit details which many mainstream kits seem to ommit. I have build the airfix P-40 recently and it was a dog of a kit in my opinion with lacking detail and most of the mistakes were not self inflicted as i noticed them in other builds of the same kit although i am also not without guilt 🙂 so not all is gold that shines in mainstream 🙂 You got to hand to short run manufaturers one thing though - they produce kits of esoteric kits which we never see done by mainstream manufacturers. Even the P-36 - did not have a mainstream kit made for years after the monogram and heller kits even with the fact that it's an important plane in US aviation history. SH made an attempt but I can not locate that kit anymore, so as always you take the only game in town and are happy that it exists when you need to have one in your collection. I heard that eduard and AZ are not friends after both did the spitfire in 1:72 and had different opinions on the accuracy of both of them 🙂
19 October 2020, 17:09
They had indeed, check out whether you're gonna have to split the cowling or not. Today I'd cut it in 3 parts and rebuild to get the symmetry back. Hopefully your example is better, fingers crossed 👍
24 October 2020, 17:01
Update: Filled gaps in firewall and rear wheel bay with Mr Diddolved putty - I can reallr reccomed this product as it realy saves much time with ckean up using normal puttty, then primed most of the parts grey. Other which will be painted metallic colours will be primed in black.
24 October 2020, 17:01
Thanks for the advice Łukasz! You are doing another one or correcting the french one? Just asking as I have still 5 in my stash 🙂
24 October 2020, 17:04
Been watching an online auction of the very rare 75H version lately, but gave up for budgetary reasons 😄
As I messed up the fuselage markings on my Hawk I still consider bulding another one, also a Finnish and West Indian examples. Will see if the plan ever comes true 😄
24 October 2020, 18:39
My plans are of building another Pearl Harbor defender, this time in silver livery, an US A-8 version, a chineese one and an USAAC P-36C. If this build doesn't destroy my enthusiasm then i will most prpably proceed with those plans as the P-36 is one of my favourite planes.
26 October 2020, 11:48
Update: backdated the wing to P-36A configuration - deleted the wing guns covers and ammo case chutes, installed the canvas "boots". Some holes and scratches still visible as I use clear super glue for gap filling. It took consderable amout of test fitting to get a good fit.
23 November 2020, 19:39
Coming back to the project due to priming work on the dongfeng. Parts that will be painted silver or metal are primed and ready for paint. Much clean up was needed but my love for the hawk keeps me going further 🙂
18 February 2021, 19:55
First layer of tamiya bare metal silver applied, left them to dry for the night.
19 February 2021, 20:04
Second layer applied and did the rear side of the parts also.
20 February 2021, 19:59
Coming back to this project after the completion of the Dongfeng-1, working on the gaps after joining the wing together and working on the correction of the panel lines as they did not match up after aligning the lower and upper sides. They will be later cleaned and smoothed out with tamiya extra thin. Did also mask the cockpit floor in order to spray bare metal silver as the part were left unpainted.
9 April 2021, 17:56
Did end rough rescribing of lost detail after filling. Now it is time to refine 🙂 Did alspo spray bare metal silver on part of the cockpit flor, corrected small blemishes on the propeller and did one side of the rear landing gear.
11 April 2021, 16:56
Managed to smooth the lines with tamiya ultra thin yesterday. Wing sanded from 800 to 2500 grit, the surface will be further refined before priming. Did also start with detail painting of the cockpit floor.
13 April 2021, 20:00
Welcome Marek! It is but as for now it's the only game in town in regards of new tooling as the special hobby kit is very hard to find. Hope Clear Prop or Dora Wings will tackle the P-36 in the future.
14 April 2021, 14:33
Working on the detail painting of the interior. Checked also references for the hawk and did fill some panel lines on the lower wing which did not exist on the real plane, at least according to 6 reference materials.
15 April 2021, 18:41
Detail painting of the cockpit done, drybrushed silver on the cockpit. Used the yahu instrument panel, as always it ads a lot of detail. Now a coat of varnish and a black wash. I do not recommend ak true colors for brushpainting as they leave a irregular surface wot brushstrakes visible.
20 April 2021, 18:38
Black wash added. Now one more coat of varnish and it's time to glue the cockpit floor to the fuselage half.
22 April 2021, 19:08
Seems like a lot of preparation which will undoubtedly reap dividends later!
22 April 2021, 20:27
Yes, Andy I hope it it will! Enjoying the build so far. Attached the floor today and did some simple 30.cal imitations on the instrument panels as they were visible in the original.
24 April 2021, 16:37
Attached the yahu instrument panel today, cleaned the future glue areas on the fuselage sides and added locating plastic 0.3 mm stripes on one side. Suprise, suprise, the halves didnt come together after attaching the instrument panel. Had to substancially trim the other fuselage part where the panel meets the side.
25 April 2021, 17:21
The desktop is just the beginning, still looking forward to seeing what your cowling has to offer 😉
26 April 2021, 08:08
Glued the fuselage together today. Used pattex sos superglue as to get a good bond and already fill the gaps/seams. No getting away without sanding everything here. Fit is horrendous unfortunately. Test fitted the front windshield also today and fit isn't as bad as on the example built by Łukasz. Hopefully I will have also better luck on the cowling 🙂
26 April 2021, 18:39
Filled and sanded all seams, rescribed lost panel lines, needed to do some corrections with tamiya easycsanding ca glue. Sanded and filled the cockpit rear wall. As you can see fit is not good.
29 April 2021, 18:45
Fuselage sanded and rescribed. Did some detail work, mainly painting and drybrushing the sanded of interior colors. Added a black wash on the rear panels where the rear glazing will be mounted, and drubrushed it with silver. Had to modify the pavla resin seat extensively to get it to fit also removed the too thick seat framing and reconstructed it with bras wires.
2 May 2021, 16:23
The side fuselage areas under the rear window scallops should be bare metal, not interior green.
[img1]
2 May 2021, 17:49
You are right when it goes for the nmf hawks, but the OD/NG painted ones had been painted curtiss green (which was basically a bit more yellowish IG) or IG. See the cover drawing of this project.
2 May 2021, 17:54
My understanding in the P-36 scallops is that they were painted in the same manner as on P-40s with that area being OD on OD P-36s.
gstatic.com/hostedimg/155f8d711c90f555_large
Regardless, your project looks very nice.
2 May 2021, 20:38
None of my references about the P-36 show that they were painted in OD, actually on all the photos and collor drawings that I found the scallop color differs substancially from the OD. The OD scallops were present on P-40CU's for sure and B' and C's, but also not always.
Anyway, thank you for your good words.
2 May 2021, 21:10
Did glue the the wings to the fuselage today. Dry fitted and adjusted extensively by scraping the mating surfaces to get a decent fit. Bad fit is strong on this one 🙂
3 May 2021, 16:56
Smoothed out the seams and rescribed lost deatails. Sanded the fuselage from 800 to 1500 grit and smoothed out the rescribed panel lines with tamiya extra thin. As tamiya primer and as sprays give a good, thick layer the panel lines will blend in smoothly even if the apear deep in the photos.
12 May 2021, 19:28
Holy moe..
That looks like a lot of work and even for Az standard (that i am quiet familiar with) really bad to be honest.
Great that you keep up the good work and efforts and iam sure you will turn this into a little gem 👍
12 May 2021, 19:43
Thank you Daniel! The kit is really a dog, but I enjoy it actually as it is really testing my skills and patience. The Hawk is one of my favourite planes so there are 5 more in the stash. This one has at least a good engine representation, the G version one is really horrible.
12 May 2021, 19:47
Attached the rudder, fit is again very bad, much sanding had to be done to make it look at least acceptable. Had then better luck with the horizontal stabilizers which had better fit, still filled the joints with super glue to close some gaps. It's on to sanding once again....
3 June 2021, 17:12
Thank you Cuajete! I think it is the 2nd worst kit i ever tackled, the MisterCraft Yak-1 taking an undisputed first place 🙂
3 June 2021, 18:54
I suggest you try a High-Planes or a Mach-2.
You will wish didn't know what the word fun is in symbiosis with pain 😄
3 June 2021, 19:12
So much to choose from, so short on time! ? I am actually actively looking for a Mach-2 RB-57, so maybe I will delve into the dark side to find out what real kit pain is like ?. Although I still have 5 versions of the AZ hawk to do, so no shortage on punishment?
3 June 2021, 19:21
Needed to take a brake from sanding and filling so did start some detail work. As P-36 had at least 4 different styles of propeller markings I needed to decide which ones to do. Setteled on the late style ones as the P-36 was already heavily phased out by the P-40 in time where the japanese attacked Pearl Harbor. Additionally the painting scheme was the same as the P-40B with silver outer blade sides in natural metal and insides maroon with identical prop markings. Was able to scavange leftover prop marking from the starfighter set I used during the P-40B build. Did paint the seat belts interior green with gunmetal buckles. Painted the engine cylinders in the sane color using the AK true metal wax. Will do some wash work next.
5 June 2021, 16:19
Did a black wash on the seat and a black and a engines and turbines wash from ak on the second engine row, which actually looks good when applied.
9 June 2021, 19:37
Disaster struck when I tried to put mr hooby matt varnish on the firewall painted with ak real color as it dissolved the paint. Did a quick cleanup with tamiya airbrush cleaner which did an outstanding job. Used pactra interrior green instead which takes the varnish without problems. Installed the lower intake in closed position, the fit was as always bad so filled it with super glue, eill smooth it out after inslalling of the cowling.
17 June 2021, 19:24
Applied a wash to the firewall and engine compartment and drybrushed some silver. I instaled the second engine row and did some detail paintwork on the first engine row.
20 June 2021, 18:27
Did some wash job on the first row and prepared the ingnition cables.
22 June 2021, 16:57
Added wiring to the engine and glued the first row in the engine compartment.
23 June 2021, 18:05
The original picture of the engine looked like it had no rings on the pistons, later pictures do, I apologize for the error
24 June 2021, 16:51
@Dave: please do not apologize as I am still struggling with making good pictures so the fault is whole on my side🙂 The engine keeps the basic outline of the R-1830 but the painting instructions are wrong in regards of color suggestions. Regardless, thank you for tuning in to my build!
24 June 2021, 17:20
The cowling is unfortunately too wide so I decided to cut of the lower part of it in order to attain a better fit. Had also to cut a small part of plastic on the front fuselage to attain a more symetrical look.
24 June 2021, 20:15
@Cuajete: the kit is overall bad news but I am now stuck with 5 more ?, the subject is what keeps me going. I hope that Clear Prop! will issue the P-36 ASAP as they have the hawk 75 in the works. @Łukasz: I hope that the climax didn't dissapoint?
25 June 2021, 20:08
Added the cut off lower part of the cowling. Another sanding orgy awaits?
25 June 2021, 20:11
Sanded the cowling smooth and rescribed it. Added the exhausts. The instructions are vague on the locations of them so did have to check references in order to locate them as correct as possible. The panel lines are also incorrect on the lower cowling so another filling ans sanding session awaits.
6 July 2021, 19:35
Back after a long while due to moving to Germany. It took some time to rearrange my workbench there. Dry fitted and sanded the clear side panels. Fit is bad. Did additionally treat the parts with tamiya compound which improoved the clarity slightly
20 October 2021, 19:20
Good to see you ... zurück? 😄
The climax result looks good, I remember how tricky it was and you got better result than me 👍
20 October 2021, 19:33
Thank you Łukasz, yes I am fortunately zurück🤣, did miss modeling for those months I wasn't able to do anything in this regard. I am able to avoid most of the pitfals of this kit due to your build so your pain wasn't for nothing👍 It takes a lot of skill and patience to finish this kit, the more respect for You that You were able to push through and to finish it👍Oddly I am enjoying this build very much.
20 October 2021, 20:03
Your build on the other hand makes me wanna buy another set sometimes 😉
20 October 2021, 20:04
Thanks. Have 5 more in the stash if You are interrested😉 I hope Clear prop! will tackle the P-36 in 1:72. Have both of their new Hawks in 1:48 and they look very good. Particulary the clear parts are cleverly designed.
20 October 2021, 20:13
The fixed gear versions loom on the horizon mate: 🙂
H-75O Hawk (Clear Prop! CP72021, 1:72)
H-75N Hawk (Clear Prop! CP72022, 1:72)
")
")
20 October 2021, 20:28
Looking forward to get them, hopefully there will be no availability issues in Poland or Germany. Thanks for the heads up mate!
20 October 2021, 20:41
Disaster struck after trying to glue the side glas with help of tamiya extra thin. Had to rework the sides and also the glas with 800 -2500 grit sanding paper and the with tamiya compound. Did masking after it had to use both tamiya masking tape an montex masks - after sanding the clear parts to fit the masks didnt fit. Will try with mikro kristal clear now.
29 November 2021, 20:08
Used them already on the P-40 with moderate effect. We will see as i want to help myself with a sharp scalpel blade on the outlines during separation. They leave much residue and that is also a problem. Nevertheless, I am ready to fight to the end with this kit😉
30 November 2021, 21:26
The rear glass fitted horribly and left a nasty gap after sanding it to fit. Carefull application of micro white glue and then filling it with mr surfacer 500 did the job. Another sanding sesion awaits. Apllied also matt clear on the smal parts in order to start chiiping and appling wash to them.
15 December 2021, 10:32
Looking at your struggle with the side windows I think the UV glue will be my solution next time I pick a Curtiss fighter.
15 December 2021, 12:06
After sanding down the surfacer 500 with 800 to 2500 grit and corrections with pattex super glue I managed to blend in the clear side panel to the fuselage to in my opinion a very good effect. After a treatment with tamiya compound the clear part is now almost crystal clear. Did a black wash to the smal parts. @Łukasz can you elaborate abut the uv glue use as this is new to me?
6 January 2022, 15:59
Well, I have tested two of them, switched to Bondex as it doesn't dry on the tube when stored. I used it for windows on my Jetstream, Canberra and Twin Otter builds and for other details too (e.g. the tip tank nose lights on my FAF Thunderjet). You can shape it a bit (it's quite thick) and then harden it using included LED (v.slow), sunlight (bit faster) or a nail hardener stolen from wife/girlfriend (being the fastest). Afterwards it's hard and difficult to sand, but removable. It's bit yellowish sometimes too (on bright backdrop). Hope that helps.
6 January 2022, 19:21
@Łukasz: thank you for the information, I'l try it on one of my future builds.
@Bas: Welcome!
7 January 2022, 18:16
Just don't touch it before it's really dry, otherwise it's rather sticky
7 January 2022, 23:33
After a long fight i managed to attain a good flush fit on both the front canopy and the second side window. The side window needs some final sanding and tamiya compound treatment but the build is steady getting nearer to the priming stage.
23 February 2022, 21:09
Disaster struck when I was cleaning residue inside the inner fuselage windows as the window came off due too much stress - I used too much of cloth material which ejected the window outside. I will use this as an oppotunity to show how I try to do side fuselage windows to get a flush fit. Naturally after priming I paint the sides in the appripriorate colours. It is interresting that with OD NG P-36 and P-40 there are still discusions about the inner side windows colour. I am going with the interrior cockpit colour.
19 March 2022, 00:49
Finally done with the side window. As you can see on the photos the procedure is as follows:
After 2 coats of paint I drybrushed silver on the base color, then sealed it with matt varnish, then washed it with tamiya panel liner black and sealed it again. After this I used microscale kristal klear o glue the window to the fulselage. Then used pattex sos super glue as filler and sanded the window flush starting with 1200 grit to 2500. I finished the window with polishing it with tamiya compound. I rescribed the outlines of the window to give it a more correct shape - the one on the kit is incorrect.
10 April 2022, 15:55
@Cuajete: thank you! After some work the kit is slowly getting ready for primer.
22 May 2022, 15:06
Primer ready, did some pre shading just to do some airbrush exercise - still not the desired endstate but Im ok with the result.
13 June 2022, 18:14
Thank You Andy! Vacations and jumping from Germany to Poland and around limited the time I could work on kits lately. Nonetheless this one is going to be fininshed soon - or at least I hope it will be 🙂
26 July 2022, 19:26
Now comes the hard part: there is no photogrphic evidence of how Brown's plane looked like. We only have the statements of Brown himself that states the plane had a number 2 painted on it and his mechanic which stated that the aforementioned statement was bollocks. I think the painting guide of the 48th scale P-36 from Academy takes a very good approach showing 3 possibilities of how the plane might looked liked. Having some military expierience and taking into account that hawaii was a boring assignent I assume that the commanders had many ideas of "standarisation" just to keep the soldiers busy, thats why I will go with scheme 2 as the most propable, as it looks the most alike the P-40B's that were stationed there, modyfing it with painting OD on the full lenght of the fuselage sides like the P-40,s. There are actually not to much pictures of OD P-36's and some have this type of OD fuselage sides.
28 July 2022, 16:41
Tamiya AS-6 Olive drab sprayed on. Thank you for your comments Łukasz and Cuajete!
31 July 2022, 16:53
After some research foun a picture of a Pearl Harbor P-36A which backs up my theory. That one has a two digit white number behind the cockpit! It also looks as there is not much wear and tear on it so I will go easy on chipping.
8 August 2022, 17:04
Underside decals on. There is really something special about those pre war USAAC markings.
11 August 2022, 16:53
Decals on, now on to sealing with mr hobby premium topcoat and a wash.
13 August 2022, 13:28
The fight continues. Managed to mess up the clear parts as always, had great difficulties to attach the opened up canopy and it managed to crack a bit on the upper side. Not much left to do, hope to finish it until the end of the year.
7 December 2022, 18:17
Thank you Cuajete! This fight is almost over. I think i will sell the other 4 that i have in the stash😵💫
7 December 2022, 20:21
I hope that Clear Prop releases this version. Their current H-75s are really good.
7 December 2022, 20:42
Thank you Łukasz! Many buisness trips last few months had stalled work on the Hawk. Cuajete, I hope it also, this is a nightmare of a kit 🥴
7 December 2022, 21:47
Modeling the hard way. I think the kit needs agreat effort.
Outstanding build, Patryk. Congratulation! 👌
9 December 2022, 14:59
Did the rigging and landing gear today. A few more days and it will be completed.
9 December 2022, 19:12
All parts assembled. Just the painting of the pitot tube and a small clear varnish touch up remains. I think the landing gear legs are too long - noticed it when compared to the airfix P-40B.
10 December 2022, 21:22
Thank You Cuajete and Robert. Once I paint the pitot I will post a few more finished result pictures. Done the touch up today, just the pitot remains. A dog of a kit but still satisfied with the result, many things were learned. From the 5 kits in my stash will keep just one that I borrowed a few parts from, just to make a C bird because it is not sellable in this state. Hope Clear Prop! will do the P-36 in the future.
11 December 2022, 18:39
Calling it done. Not 100% satisfied but still happy that I was able to finish this dog of a kit and got a somewhat decent result. The modification to the A standard and the painting was fun as I have something that is in my eyes not standard to the kit. Learned much and done a few new things so the goal is reached.
25 December 2022, 16:33
Well, it's great in my view Patryk S. over the line for Christmas. Well done.
25 December 2022, 18:20
Congratulations mate, very well done 👍 Love it, still thinking it's better looking than the Kittyhawk/Warhawk family
25 December 2022, 19:18
Thank You Łukasz! The P-36 has it's charm. Still hoping for Clear Prop! to do it, if not I am sentenced to do the C and G from AZ which will surelry initiate some kind of mental disorder to my person😜.
25 December 2022, 19:26
Very nice, Patryk!
Congrats!
I decided to go doom by recently ordering a G version. I hope I survive the attempt if Clear Prop doesn't come out with their upgraded kit.
26 December 2022, 19:53
Thank You Cuajete! I survived so You will also! One advice is to get an aftermarket engine as it is terrible in the G version. New fuselage halves added in the kit also so maybe the fit is better? Who knows? Will tackle this eventually in the next deacade😜
26 December 2022, 23:14


